Inside: All things play dough, all in one place! Get my easy recipes for homemade play dough, how to organize & store your supplies, plus simple activities for toddlers and preschoolers.
This post may contain affiliate links. You can read our full disclosure policy, here.

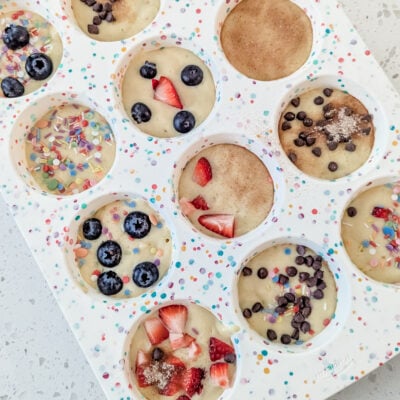
Love it or hate, play dough is one of the easiest sensory activities to have on hand.
I get that the colors mix, I know it can dry out and get crumbly, but kids love it and there really are so many possibilities for play.
How to make play dough fun?
On its own with some basic tools it can get boring or repetitive but there really are endless possibilities, so many preschool curriculum integrations and sensory play ideas that will keep play dough a most-requested activity in your home.

In today’s post I’ll share some ideas for:
- trays & kits
- seasonal activities
- preschool theme activities
- plus easy recipes for homemade dough

How do you make homemade play dough?
Below you’ll find 2 basic recipes. I find that the dough actually stays soft for a long time if it’s stored in a zip-top plastic bag with all the air pushed out before closing.
And of course, making homemade play dough is totally optional, but it can be a great rainy day activity if you need one!

Easy Homemade Play Dough Recipe
This recipe makes one generous “batch” of dough. If you want to make different colors, I would recommend making 1 recipe for each color, washing the pot & utensils in between.
To make it easy, I’ve saved all of the ingredients to this list on Amazon!
- 1 cup all purpose flour
- 2 teaspoons cream of tartar
- 1/3 cup salt (you want just regular white table salt)
- 1 cup water + a few drops of gel food coloring (more on this in the instructions)
- 1 tablespoon vegetable oil
Step 1
In a medium saucepan, gently whisk the flour, cream of tartar, and salt (with the heat off).
Line a baking sheet with parchment paper (this is where you’ll put the warm play dough when it’s done).
Step 2
Fill a liquid measuring cup with 1 cup of water and mix a few drops of gel food coloring into the water.
Step 3
- Pour the water into the saucepan with the flour, and gently mix.
- Add the vegetable oil.
- Turn the heat on the burner to medium-low and keep mixing.
I do not recommend using a whisk at this point. I would switch to a rubber spatula (that you don’t mind possibly ruining with food coloring).


Step 4
Keep mixing! It will look like a weird, watery, lumpy mess – but trust me! It will come together.
Step 5
When the play dough comes together, carefully remove from the pan and place on the parchment-lined baking sheet to cool. Clean off the pan and utensils before starting the next batch!
After the play dough cools, store in a zip-top plastic bag with the air squeezed out.

Easy No-Cook Play Dough Recipe
If you don’t want to mix the play dough in a pot on the stove, you can use the same recipe above to make “no cook” play dough – here’s how!
- Mix all of the ingredients (except water and food coloring) in a heat-proof bowl (like a glass bowl)
- Boil the water in a tea kettle or in the microwave
- Add the food coloring to the boiled water and pour into the dry ingredients
- Mix with a wooden spoon until it comes together
You’ll also love these posts!
- Hands-on Activities for 4 Year Olds
- 3 Year Old Preschool at Home Routine
- DIY Christmas Play Dough Kit
- 10 Must Try Spring Activities (Indoor & Outdoor)
How to Organize & Store Your Supplies
Shop all of the supplies shared in this post on my Amazon!
Storage Container
This is hands-down my favorite container for storing tools and accessories.
The smaller compartments in the tray are great for cookie dough cutters, rolling tools, and other small pieces.

The bottom holds bigger pieces as well as dough containers.
Keep the caddy stored in your linen closet or a cabinet in the kitchen so it’s easy to take out when needed.
Drawer Storage
I got the wide 3 drawer cart (pictured below) to store those big activity books but I also dedicate one of the drawers to play dough as we have a lot of supplies.
You don’t need to have a caddy and an art cart/drawer, it really just depends on how much supplies you have to store.


Play Dough Activities for Toddlers & Preschoolers
Below you’ll find fun ideas for what to do with toddlers 18 months through 2 year olds, 3 year olds, and big kids! Rather than linking everything individually, I’ve saved all of these supplies to an Amazon list!
How to Make a Play Dough Tray
This is my go-to idea and my first choice if I need something screen-free to entertain my kids and keep them all sitting in one place.
What you’ll need:
- a plastic chip & dip tray (Dollar Tree has these in the party section)
- play dough (homemade or store bought)
- tools such as cookie cutters, rollers, plastic scissors, etc.
- add-ons such favorite characters and plastic toys (see examples below)


How to Make a Play Dough Kit
This is such a fun gift idea and my kids are always excited to receive these for the holidays, plus they make a great DIY birthday gift for a friend!
What you’ll need:
- a plastic bead box
- mini play dough containers
- tools: like cookie cutters, rollers, scissors, etc.
- accessories: I like to fill it up depending on the season or occasion!


Seasonal Play Dough Activities
Here are some fun ways to set up a seasonal play dough tray!


Preschool Theme Activities
If you’re doing preschool at home you can incorporate these activities into your weekly theme unit!
It’s is a great tool for fine motor development and easily lends itself to so many preschool themes (like bugs, ocean, construction, all about me, etc.)


This is the preschool curriculum I use with my 3 year old!
The lessons are all done for you and include everything from learning activities to STEM to crafts and sensory play!
Shop all of my supplies on Amazon
You’ll love these ideas:
- Morning Baskets for Preschoolers
- 4 Year Old Pre-K Routine at Home
- How to Make Busy Bins
- What to Include in a Morning Basket


Follow Marla on Instagram for more practical solutions for everyday #momlife


